Structure From Motion
Photogrammetry aims to capture measurements from various images of structures, objects or landscapes. The pros of this procedure is that it allows for difficult subjects to be accurately measured digitally and it can be done with an everyday camera. The cons of photogrammetry is that the images must be rectified and taken with a 5 degree overlap to create an accurate 3D model and produce correct measurements. Structure from 3D Motion is the process of creating the 3D models from the rectified images.
How to accurately document a subject for Structure from Motion:
- After decide which object you will be studying, you must begin to document the subject.
- Start in a specific spot and move about the object capturing images.
- The images MUST be 5 degrees (or a step) difference from one-another.
- After capturing the subject from all sides, you will have between 20-40 images.
- If there are any highly detailed spots on your object, repeat the capturing process focussing on those specific areas.
- Make sure to measure one or two clear areas of the structure to size your model later on.
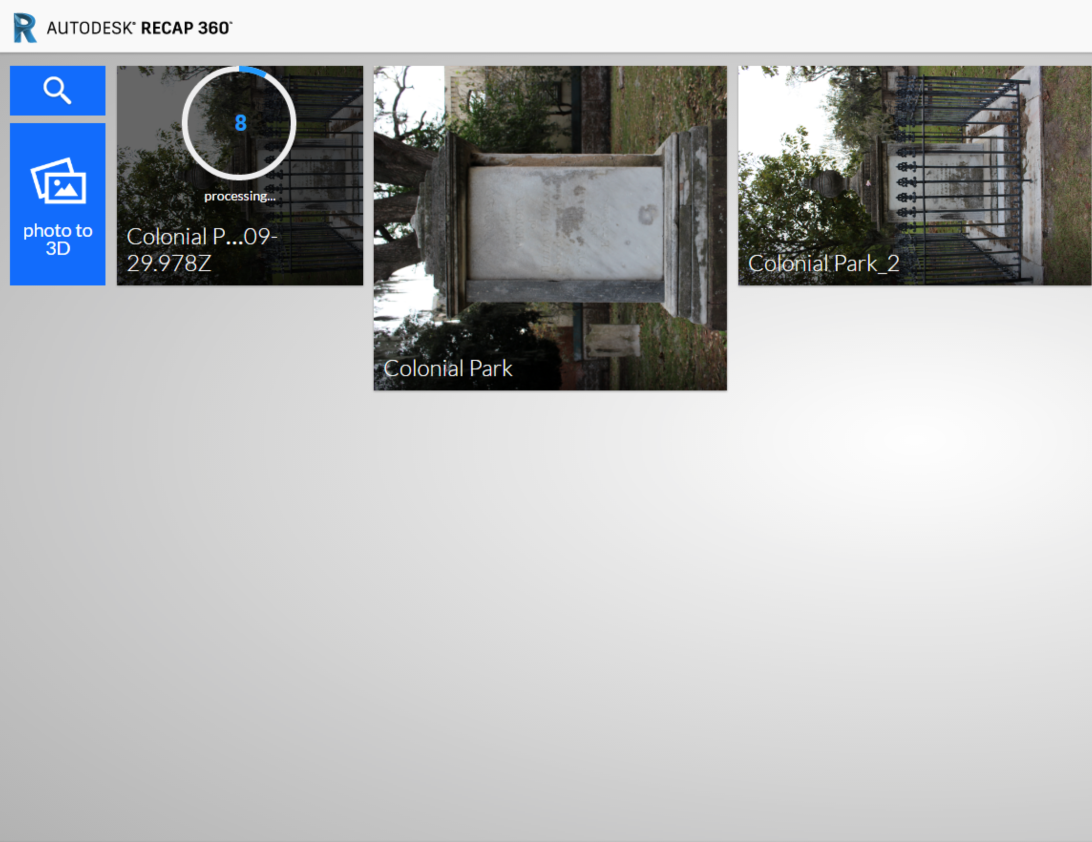
- When happy with your pictures, import them into Autodesk Recap 360.
- Select the highest quality available and save your project as a ".rcm," ".obj," and a ".fbx" file.
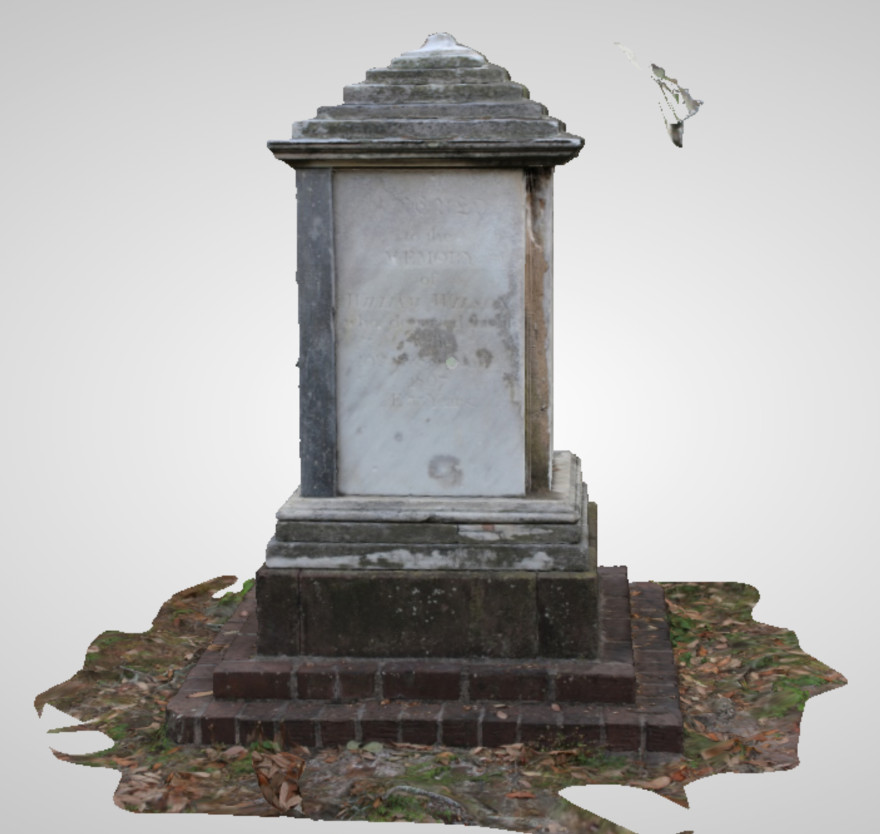
- You will receive a notification when your images are done being stitched together and you will be able to see your 3D model.
- If there are any images which did not get attached, you can stitch them manually by choosing identical points on two similar images.
- After saving the project and resubmitting it, you will receive a notice once the project is re-stitched.
- After saving the model you can now import the file into Meshmixer to make further alterations.
How to use Meshmixer:
- Open the program and import your .obj file.
- In the toolbar select "View" > "Show object browser.
- Click "Actions" > "Configure Units" > "Inches" and use the measurement which you took while studying the real-life object to size your model.
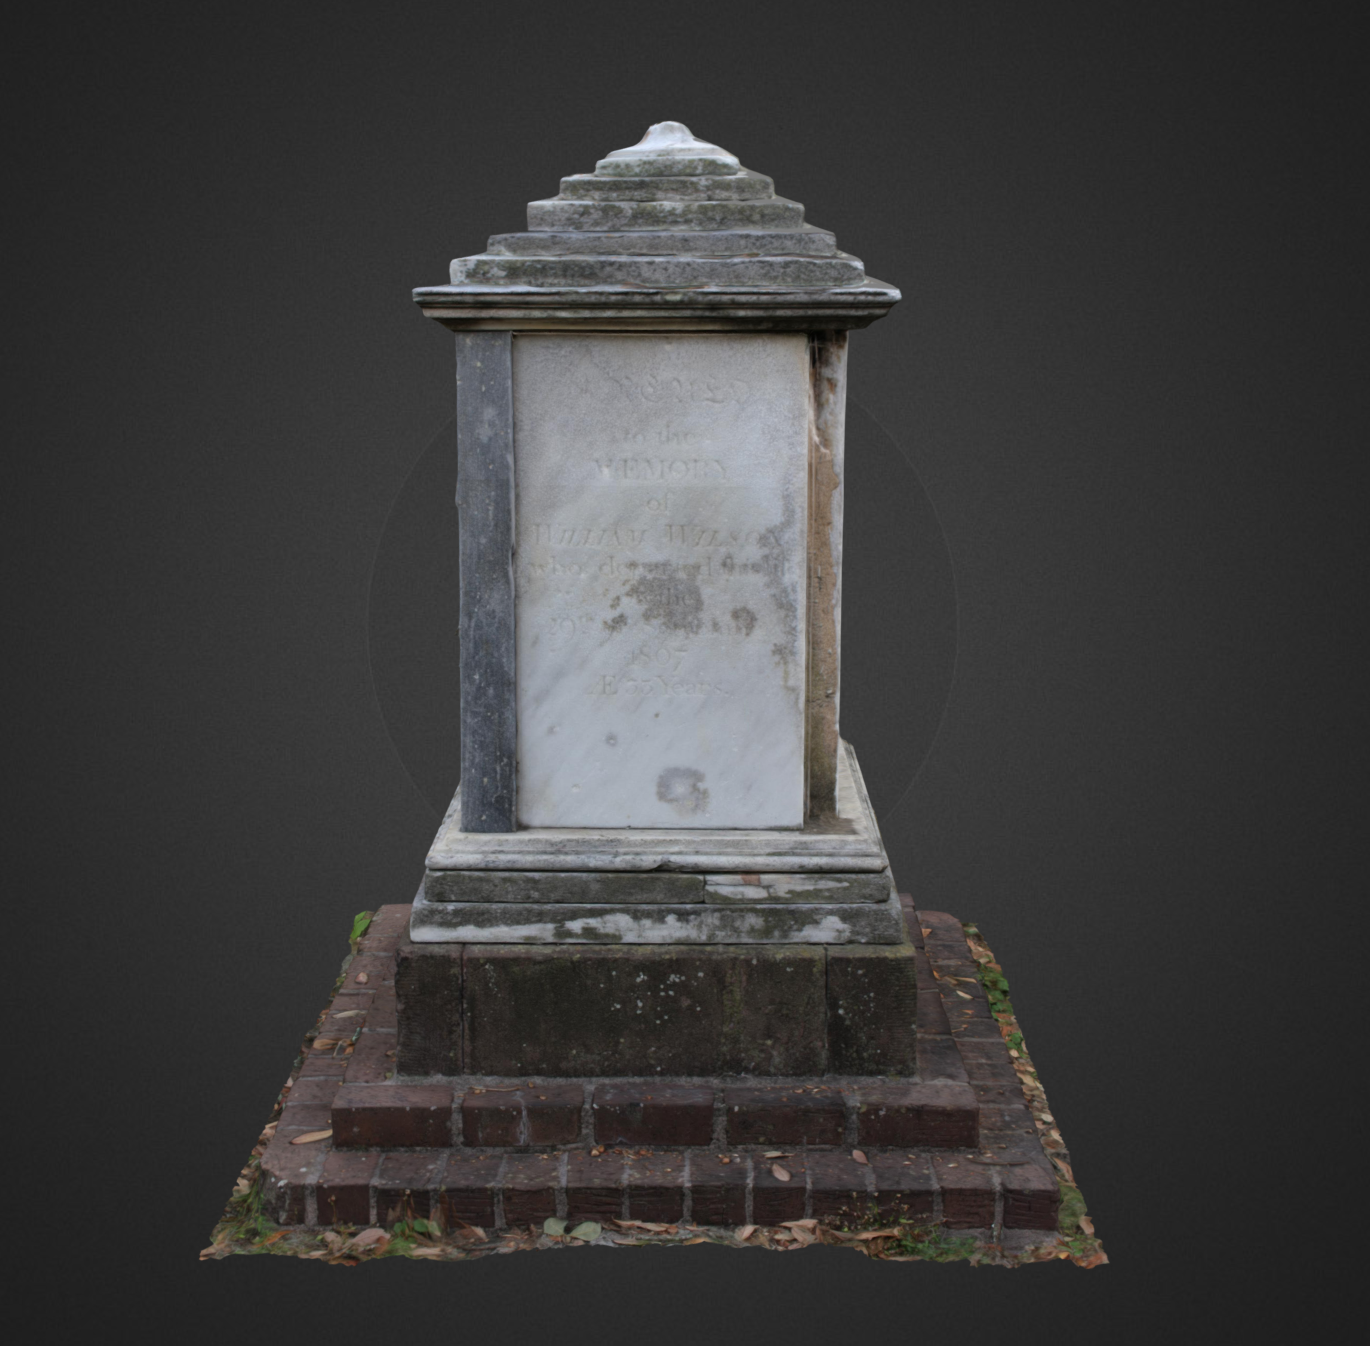
- By using the "Selection" tool you can delete any unnecessary areas which may have stitched together awkwardly.
- Here, is where you can export your model as an .obj file for uploading into Sketchfab (instructions below).
- You can now create a base for your model by selecting the "Meshmixer" icon on the left-side panel and dragging the rectangular prism over your model.
- You can use the arrows to size the prism so that your model sits just above.
- Use the "Sculpt" > " Brushes" > "Attract" to blend the base to the model.
- When done, select both models in the object browser and click "Edit" > "Combine."
- Now you can select "Make Solid" to fill your object and create a closed form.
- Make sure you change the "Solid Type" to "Accurate" and you increase the "Solid Accuracy" and "Mesh Density" so that your 3D model has more detail.
- Select "Update" to view your finished model.
- You can now choose to "Export" your project as an .stl so it can be 3D printed.
Uploading a Model to Sketchfab:
After exporting your Meshmixer project as an .obj file, you will receive a folder with three files; a .obj, a .jpg and a .mat. You want to zip this folder before uploading to Sketchfab.
Once you create an account, you can choose to upload a project. Select the folder you recently zipped closed and wait until the files are indexed.
The model will take some time to completely load, but once done you can begin adjusting the settings.
Scroll over the "Settings" tab and choose "3D Settings."
Correct the axis by rotating the x, y, or z axis until the model is straight and upright.
Apply the textures by choosing your .jpg file to be applied to the model. This will allow any textures, or materials on your object to appear on the Sketchfab model.
You can change your background by clicking on the "Background Type" option and choosing a scene which fits your 3D model.
Once you are happy with how your model looks, you can publish it for others to view!